Creating a faery wand is both fun and addicting. You will find that once you make one, you will want to make a dozen more! As we create them we can infuse the faery energy by asking for their help and assistance.

Over the centuries Druids, Wizards, and Witches have used wands for magick work. It’s only logical that if we wish to create our own faery rituals, a wand is one of the most powerful tools we can use. Especially if we create them ourselves. When we create our own wand, our energy infuses into it along with the energy of the materials we use from the earth.
As you’ll notice, the faeries will want to join in too and sprinkle their faery dust while you create it. Remember that if things don’t go your way, stones disappear, fall off, or magically don’t stick, this is the faeries telling you what’s best to use and not to use for that particular wand. They always know best where faery magick is concerned and it’s no use going against their wishes.
You’ll see that this happened with one of the wands I was working on in the next videos. Now, I always know when it’s time to just let go and let them guide me.
So before we begin you’ll want to gather some materials… Don’t worry if you have no idea how you will assemble them. Once you begin, you’ll notice that ideas will come as the feries all scramble to have their say in it.
Here are the materials I used plus some ideas of others you might substitute them with:
- A stick (dead wood, not green — one that you find on the ground is the best) and/or driftwood, or deer antler (make sure it is only a shed one, that is found on the ground)
- Small pointed crystal and/or small crystal tumbles (optional)
- Alternatives and additions for above would be small sea rocks, shells, found bits of coral, marbles, sea glass, wooden or clay beads, small shiny bit and pieces of mirror or glass, etc
- Some pretty colored or organic string, leather strips, ribbons, silk flower or leaves, feathers, etc (all optional)
- A hot glue gun or strong wood/glass glue, scissors
- Air-dry clay (Optional — and a skewer or pointed object to carve into it)
- Some acrylic paint or acrylic ink (only if using clay)
- Acrylic varnish (optional and only if using clay)
- Use your imagination! I’m sure the faeries will show you other possibilities,if you just ask them.
So let’s begin!
I like to invite in the faeries to my work space as I begin and you can absolutely use any poem or phrase you like — but if you prefer, you can say this Elven enchantment that I used:
“May faery energy and light aid me now to create beauty, healing and goodness. May this wand work only for higher purposes without malice. I welcome the wise elements with my blessings to aid my endeavor.”
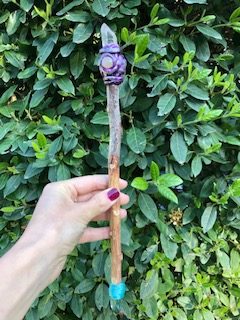
PART ONE: ASSEMBLING THE WAND
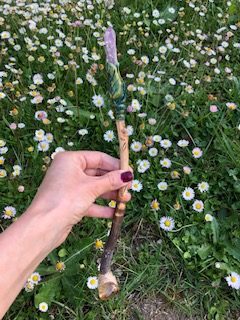
PART TWO: ADDING CLAY AND STRING


We will now need to wait a couple days for the clay to dry. This part takes a lot of patience as I’m always eager to finish them, but it’s important to respect the required drying time in order to avoid cracking.
We will also want to avoid putting them in the direct sunlight or too close to a heater as that will just encourage cracking and flaking. An dry and airy place is best and depending how thick your clay is, they should be ready to paint after 2-3 days.
Once our wands are ready we can add the last touches by painting the clay.
If you prefer you can put a coat of acrylic varnish over the painted clay when finished, but it’s not completely necessary.
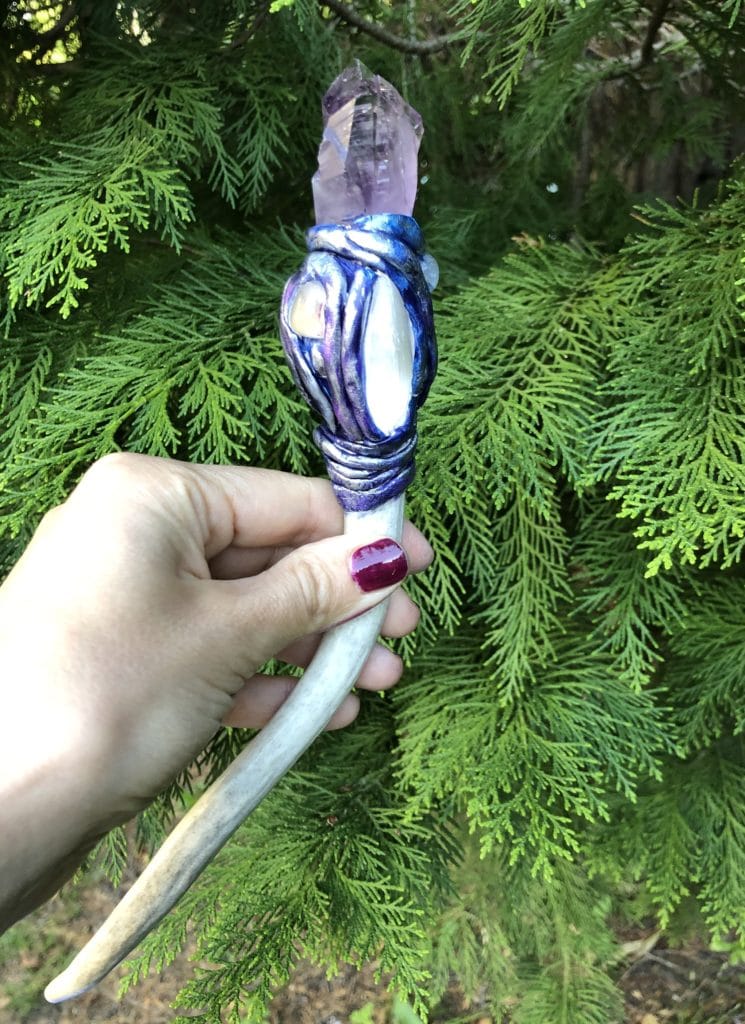
part three : painting the clay and adding the last details
Wasn’t that fun?
Now we can prepare them for our magick work by cleansing them from any unwanted energy and then charging them with a short ritual. Since we will be using them for our magick work, it’s important that they are infused with light and positive energy so that they will be effective.
You can even make this a regular practice when you feel it’s needed.
I like to cleanse them by using this short sequence:
- Sprinkle drops of salt water on the wand
- Sprinkle or rub lavender or rose essential oil, or any other essential oil you think they will like (optional)
- Light a floral incense stick, or dried floral herbs like dried lavender or rose petals, and circle the smoke around the wand three to five times saying: “I purify these wands and my heart from all negative intent. May only good reside within.”
Now we are ready to charge and bless the wand.
- We can begin by lighting a candle and saying a mantra like this: “May this wand, forged from the earth bring healing, light and restorative powers, if right and good it shall be.” (If it’s a specific wand for, say, earth healing or protection for example, you can specify the intention.
- Now hold your wand over the candle (or up to the sunlight if you are working outside) and say: “Light the way to healing”.
- Say the words again three to five times as you spiral the incense smoke around the wand.
- Clap your hands as you repeat the words again and then blow out the candle.
part four: cleansing and charging the wands
And our wands are ready!
I like to put them outside in a shady area either directly on the grass or on a tray if the grass is damp so that they soak up nature’s energy and the faeries can enjoy admiring and playing with them for a bit.
In the next chapters, I will share some fun and effective faery enchantments and spells that you can try with your newly created wand.
Remember that you can also perform them without a wand — it’s really up to you and your preferences — but you will find using one is all the more effective and fun!